# Folder Management and File Handling
Keywords: Documents, document library, files, external materials, foldersWhether creating new folders, cropping images, or renaming documents: This article guides you through all the important functions so you have your files for your sessions perfectly under control.
Expand table of contents
# Folder Menu
Click the menu icon keyboard_arrow_down to the right of the folder name to execute folder-specific actions:
- refresh Refresh folder content: Reloads the content of the folder. If someone has made changes in the meantime, this ensures you have the latest version. (Tip: Clicking on a different folder and then back again also reliably updates the content.)
- create_new_folder Add subfolder: Create your own folders within the predefined parent folder structure. Select this option to expand your document management accordingly.
- edit Rename folder: Gives the folder a new name. (Only available for subfolders you have created, not on the top level).
- delete_forever Delete folder: Permanently removes the folder. (Only available for subfolders).
Visibility
You can find the meaning of the top folder level here.
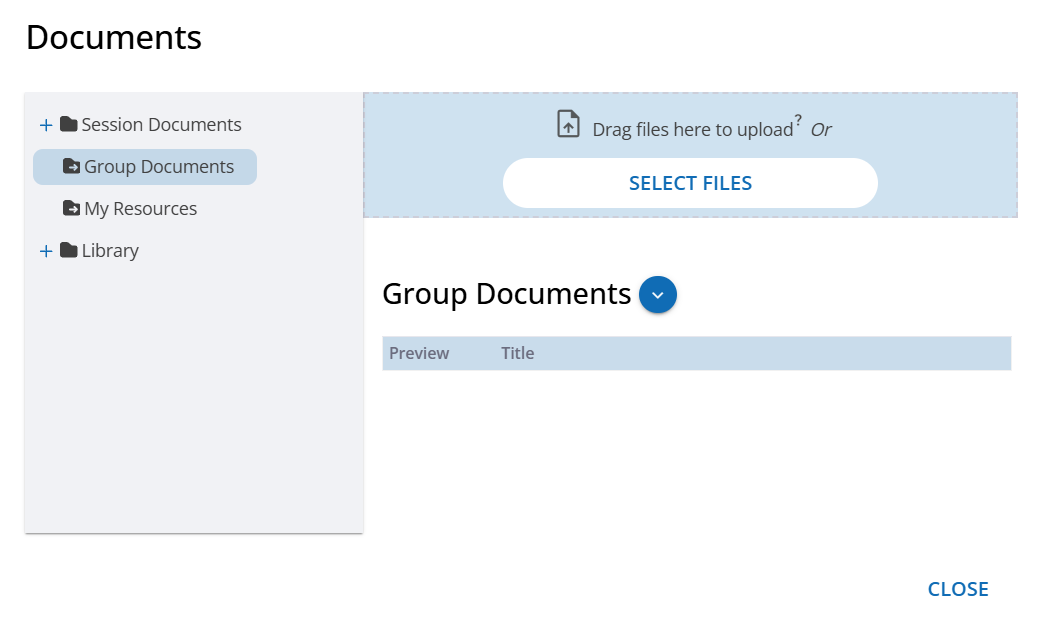
# Uploading files
The upload area is located at the top right of the document management:
upload_file Drag files to upload here or select files
You can use this to add new files to the currently selected folder. If you upload a file with an already existing file name, a security prompt will ask if you want to replace the old version.
How the upload works:
- Drag & Drop: Drag the file with your mouse to the marked area and release it.
- Manual selection: Click the "Select files" button and highlight the desired local files.
Recommended file types
For smooth file exchange and flawless display across all browsers and operating systems, images (PNG, JPG) and PDF documents are primarily recommended. Microsoft Office documents (DOCX, XLSX, PPTX) are also supported, but the PDF format is generally the better choice for an absolutely true-to-original rendering.
# Cropping images (Background images)
As soon as you upload background images, a cropping dialog opens automatically. This intermediate step ensures that the image's aspect ratio perfectly matches the respective tool and that layout elements on the platform do not shift unexpectedly.
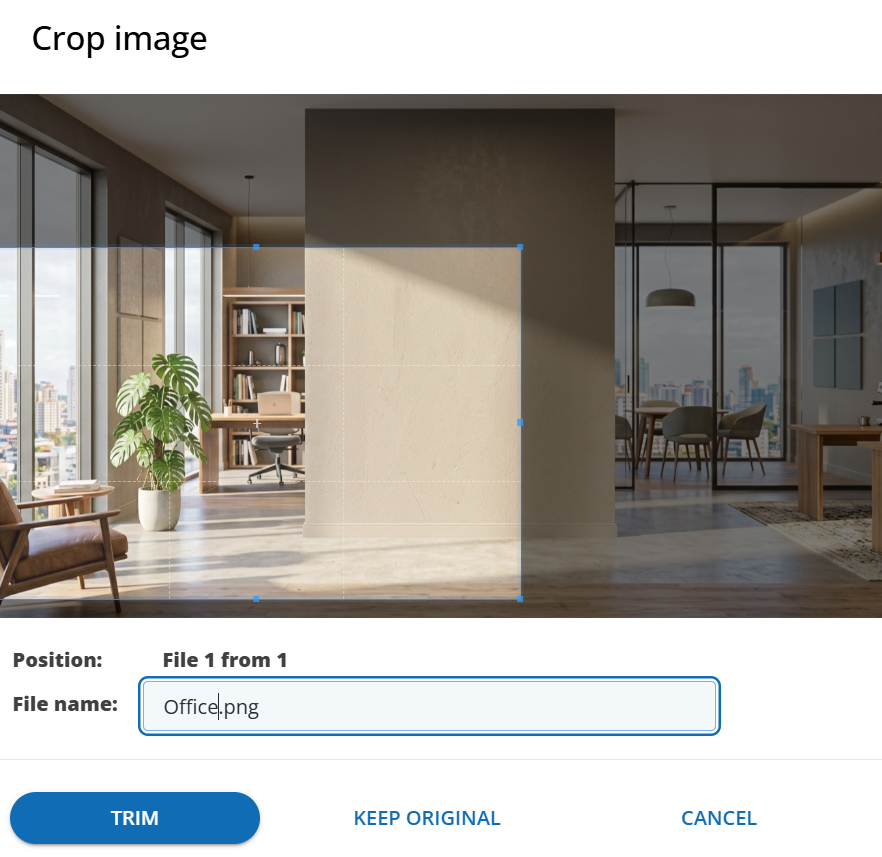
You have three options in the dialog to proceed:
- Crop: Use the blue frame to define the desired image area. The edges can be moved (the aspect ratio remains fixed). Click "Crop" to upload exactly this selection as a new image.
- Keep original: The image is uploaded uncropped and in its original format.
- Cancel: The process is stopped, and the respective image will not be uploaded.
# Additional functions in the cropping dialog
- Multiple files simultaneously: If you upload multiple images at the same time, the dialog opens for each image one after the other. A position indicator (e.g., 1/3) shows your current progress. For high-resolution files, switching to the next image may take a brief moment.
- Adjust file names: You can change the file name directly in the text field of the dialog. The change is applied regardless of whether you subsequently choose "Crop" or "Keep original".
- Double or triple height: If you want to change the background for tools that require double or triple height: First adjust the size accordingly using a predefined background image. Afterwards, you can crop and upload your own images in the new ratio. To return to the standard height, first set a predefined image again and then change the height back.
# The Document Menu
Click the selection arrow next to a document to open advanced options.
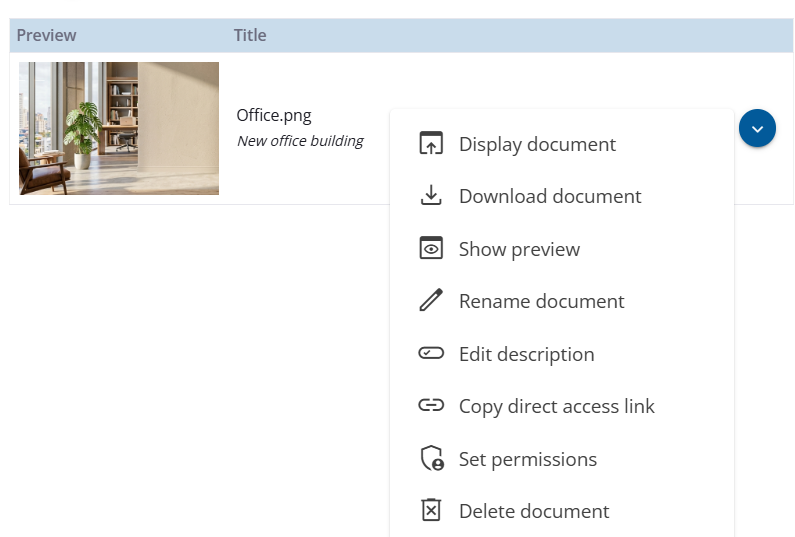
- open_in_browser Show document: When you enter or open a session, you can use this to switch the displayed document within the presentation tool.
- download Download document: Makes the document available for download via the browser in its original format.
- preview Show preview: Opens a private preview view where you can browse through the document undisturbed.
- edit Rename document: Assign a new file name. (The file extension automatically appended during upload can also be removed here if necessary).
- edit_attributes Edit description: Adds a short description to the document. For better categorization, this is displayed in italics directly below the file name.
- link Copy direct link: Generates a shareable link (e.g., for pasting into the chat). If a user clicks on it, the document is loaded in a new tab or saved in the downloads folder. Note: When sending externally (e.g., via email), recipients may need to log in with their credentials first if they are not currently active on the platform.
- admin_panel_settings Set permissions: Determine whether all participants of the group or session are allowed to edit the document, or only the person who uploaded it.
- delete_forever Delete document: Permanently removes the document (provided you have the appropriate permissions).